
Insulin Injection Sites: Rotation to Prevent Skin Lumps

Insulin injection sites should rotate with every dose, using a different point within a planned body area. Home injections go into subcutaneous fat under the skin, not into muscle or a vein.
Repeated injections into one spot can cause lipohypertrophy, a fatty lump that makes the insulin absorption rate unpredictable. A practical rotation plan combines consistent spacing, regular skin checks, and correct needle technique.
Each injection needs a fresh point in healthy tissue. Abdominal injections should stay at least 2 inches (5 cm) away from the belly button.
Table of contents
- Injection regions and absorption
- A practical rotation plan
- Recognizing fatty lumps
- Pen and syringe technique
- Storage and affordable access
- Key takeaways
- Frequently asked questions
Where insulin injection sites absorb differently
Insulin helps glucose enter cells and reduces glucose release by the liver. People with type 1 diabetes need insulin; some people with type 2 diabetes also need to inject insulin.
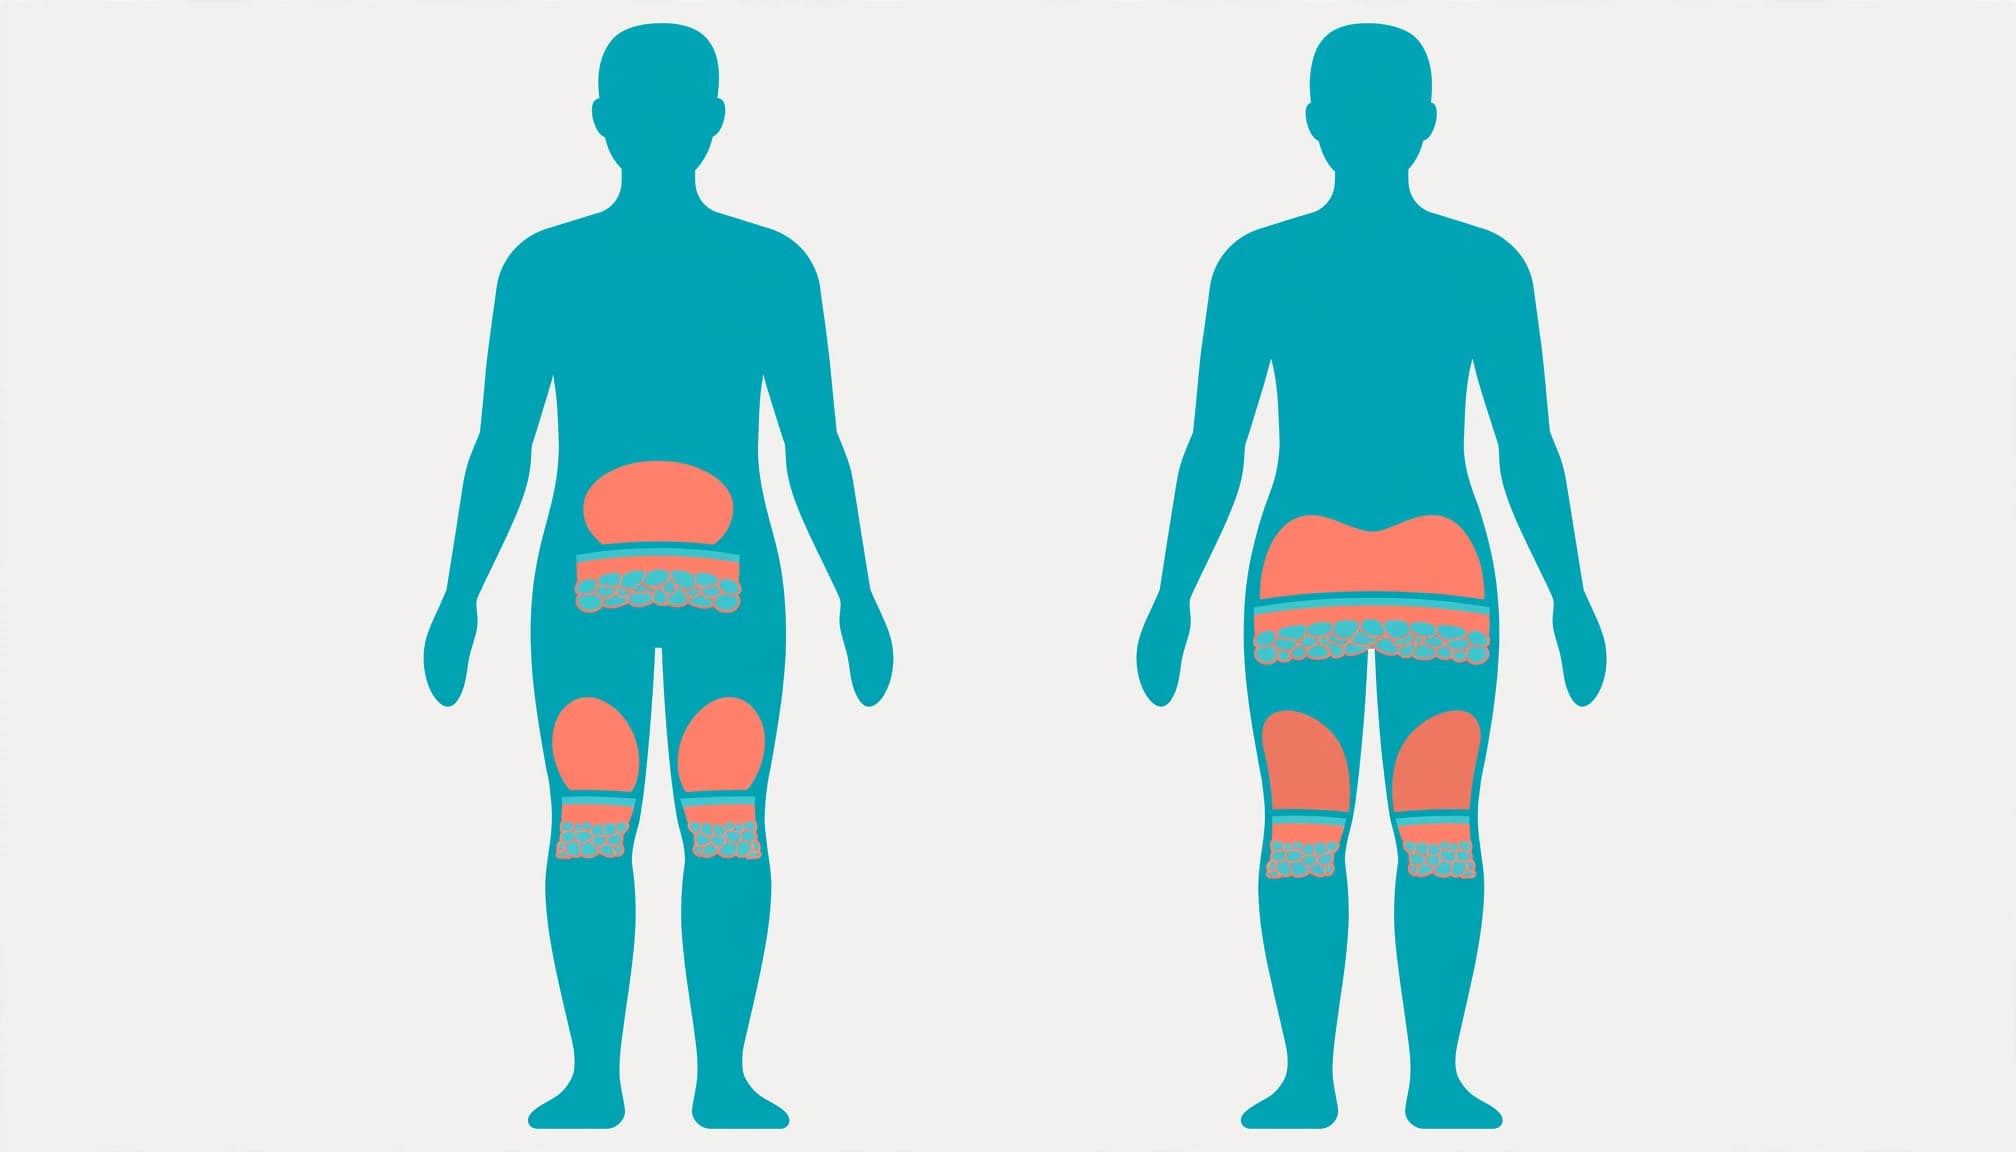
Abdomen, thighs and buttocks
The abdomen, often called the stomach area, front and outer thighs, and upper buttocks are common injection regions. These injections go into fatty tissue beneath the skin, not into an internal organ. How quickly insulin acts depends on the formulation as well as the location.
NHS Scotland describes this general uptake order:
| Body region | General uptake pattern | Placement consideration |
|---|---|---|
| Abdomen | Quickest | In the stomach area, stay at least 2 inches from the belly button. |
| Thigh | Intermediate | Use the front or outer fatty area. |
| Buttocks | Slowest | Use the upper fatty area. |
This ranking is most relevant to human insulin, including regular insulin. Modern insulin analogues can have more similar uptake across regions, so a fast-versus-slow body map doesn't determine every treatment plan.
Consistency matters. Changing body regions without a plan can introduce another variable into glucose control.
Why arm injections need individual guidance
The back or outer upper arm appears in recognized injection guidance and some insulin labels. However, it can be difficult to reach during self-injection.
Diabetes Canada's injection guidance discusses this accessibility problem. NHS Scotland discourages arm injections because a puncture can reach muscle, where insulin may act too quickly.
Therefore, arm injections need individual assessment rather than a blanket rule. A trained caregiver may make the site more accessible, but adequate fatty tissue and appropriate needle length still matter.
How to rotate injection points with every dose
Rotation means changing the exact puncture point rather than repeatedly using one comfortable patch. You can use different injection sites within one body region. A written map helps patients and caregivers follow the same pattern.
A practical plan can use four abdominal sections or separate zones along each thigh:
- Select one region for a consistent routine. Agree on a suitable region and plan with your diabetes care team rather than switching unpredictably between the abdomen and thigh.
- Move through that region systematically. Progress across one section before moving to the next. A map with points roughly 1 to 2 inches (2.5 to 5 cm) apart provides a conservative spacing plan.
- Inspect and feel the next point. Avoid lumps, bruises, scars, inflamed skin and stretch marks.
- Record the location when needed. A paper diagram or phone note can prevent repeated use of the same point, especially when several caregivers help.
The pattern should leave enough unused tissue between puncture points. A small favored patch can become overused even when individual marks appear separate.
Use a new disposable tip for every dose to reduce tissue trauma. Repeated use of the device and repeated use of one point both contribute to injection-site problems.
Recognizing lipohypertrophy and other skin problems
Thickened fatty tissue beneath the skin can develop after repeated local insulin exposure and injection trauma.
Affected tissue may form a visible swelling, but some areas are easier to feel than see. The skin can feel thick, rubbery or unusually firm. Because these patches may hurt less, patients sometimes keep injecting into them.
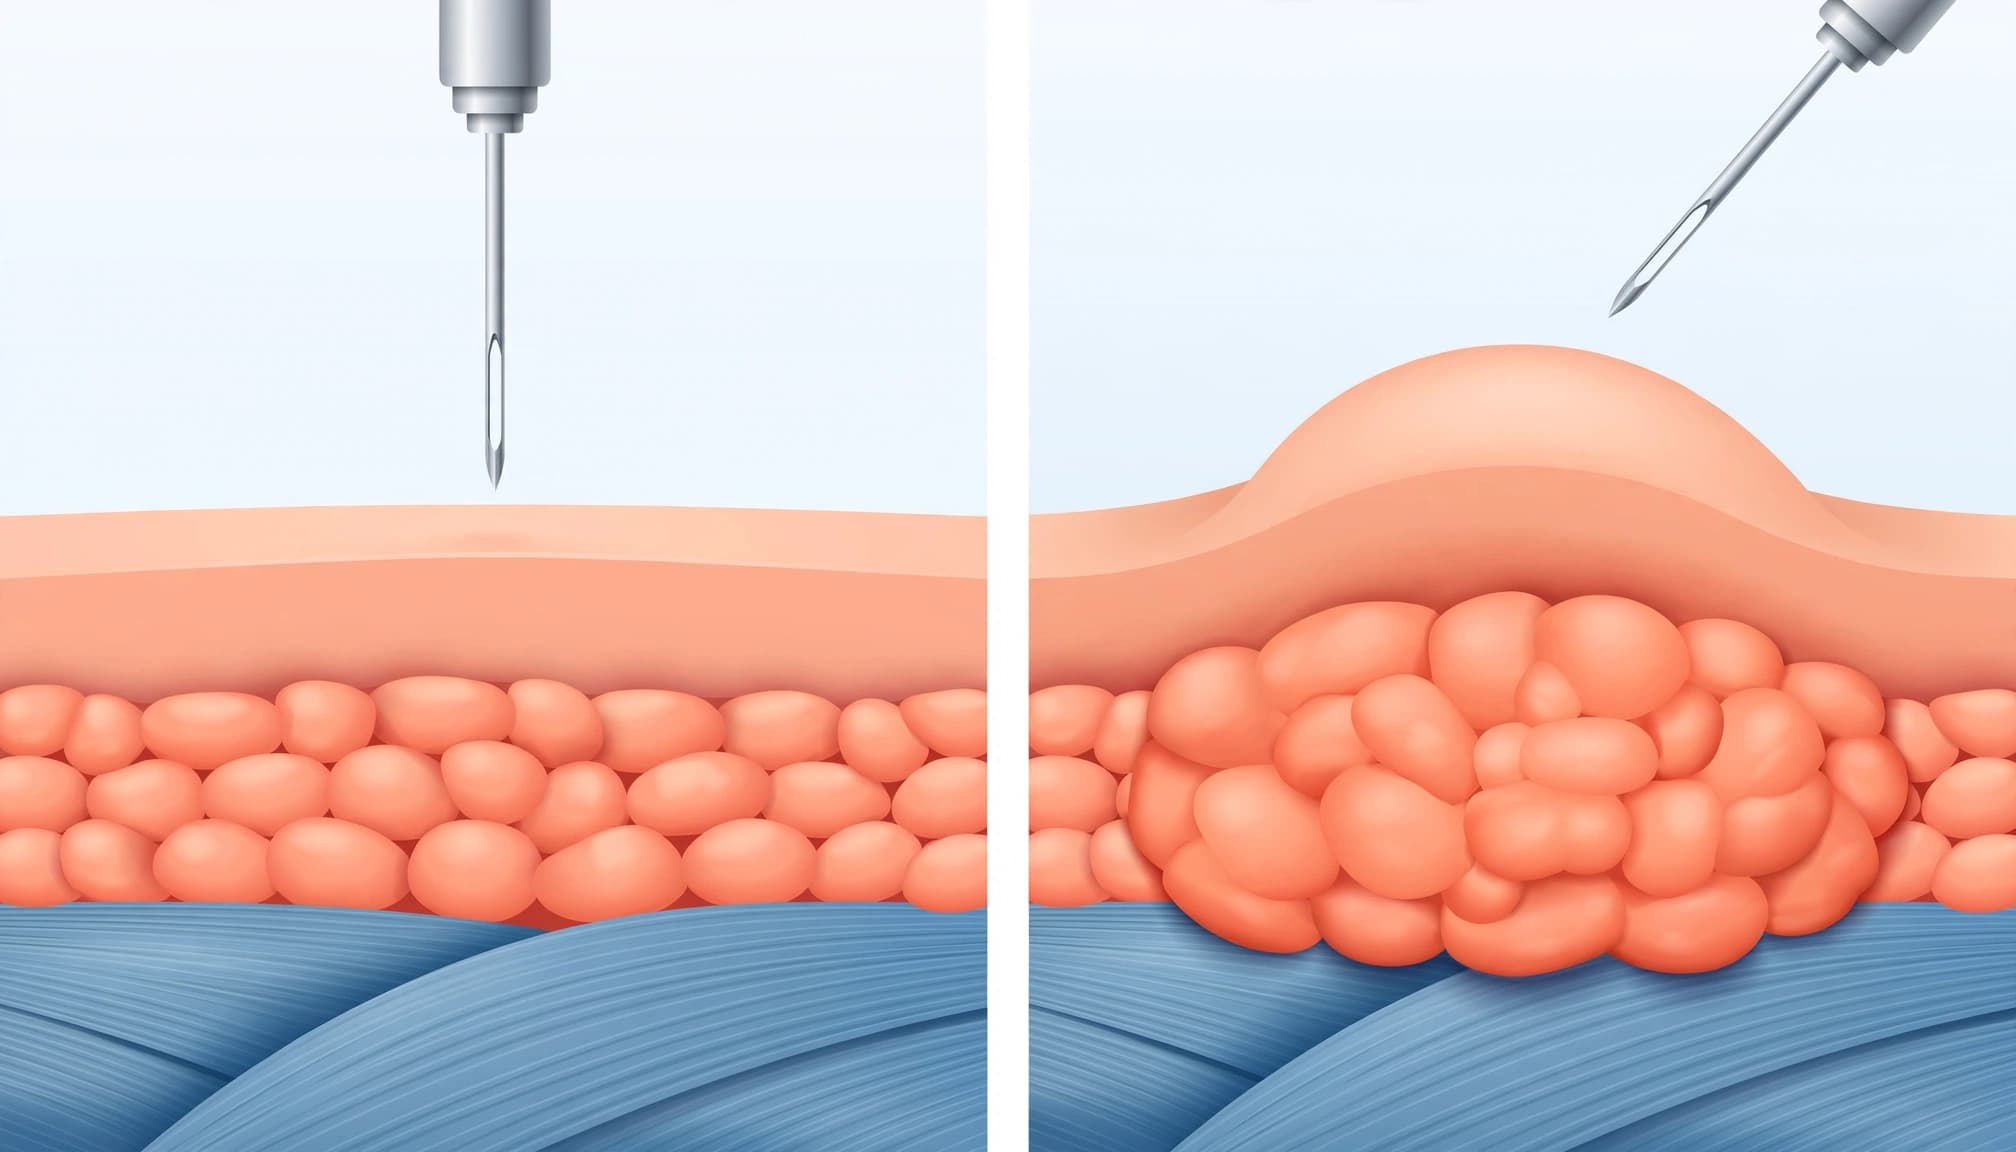
The absorption rate in thickened tissue can be delayed or erratic. As a result, glucose may fluctuate despite apparently consistent doses and meals.
Existing lumps should remain outside the rotation pattern until a clinician assesses recovery. Repeatedly injecting around the edge of a lump can continue to overuse the same affected area.
Moving injections from a fatty lump into healthy tissue can make insulin act faster. The previous dose may then cause hypoglycemia, so closer glucose monitoring and a dose review with the diabetes care team matter.
Persistent or enlarging lumps need medical assessment. Redness, warmth, discharge, fever or worsening pain require prompt attention because infection can resemble an injection-site reaction.
Severe low blood sugar, unconsciousness or seizures require emergency treatment. Repeated unexplained glucose swings also warrant a review of injection sites and technique.
Injection technique that protects the skin
Pens and syringes deliver the same hormone, but preparation differs when you inject insulin with either device. Device-specific instructions take precedence over a general technique summary.
Preparing and using an insulin pen
Preparation starts with clean hands and confirmation of the insulin name, concentration, dose and expiry date. Some cloudy insulins require gentle resuspension according to their instructions.
Attach a fresh component. Many pens use a 2-unit safety test to prime the needle: dial two units and press until insulin appears at the tip. The ICMR type 1 diabetes guidelines describe this priming step.
After selecting the prescribed dose, insert the short device at a 90-degree angle and press the dose button fully. NHS Scotland describes holding for six seconds before withdrawal; pens requiring ten seconds need the full ten seconds.
Remove the used component safely and place it in a sharps container. Pens must never be shared, even after changing components.
Skin cleaning, needle length and syringes
Clean, healthy skin generally doesn't need disinfectant for home insulin injections. Dirty skin needs washing and drying first. If alcohol is used, it should dry fully.
Most adults using 4-mm pen devices don't need a skinfold. Children, very lean adults and people using longer devices may need to pinch up your skin, following an individually taught technique. Device length and available fatty tissue determine the approach.
Syringes must match the insulin concentration. Insulin shouldn't be withdrawn from a pen cartridge into a syringe.
Heat increases insulin absorption, and exercise can speed it up. After a hot bath, sauna or strenuous activity, let overheated skin cool without changing prescribed meal-dose timing.
Storage and affordable access to insulin
Correct injection technique cannot compensate for insulin damaged by freezing or excessive heat. Knowing how to store insulin and planning reliable refills are part of safe treatment.
Refrigeration and in-use limits
Most unopened insulin requires refrigeration at 2 to 8°C. It should stay away from freezing compartments and direct contact with ice packs.
During a power outage, keeping the refrigerator closed helps preserve its temperature. Insulin also needs protection from hot cars, direct sunlight and household heat sources.
In-use storage limits depend on the product and device. Check the labeling to see whether room temperature storage is allowed and for how long. For example, the Lantus SoloStar prescribing information specifies disposal after 28 days of use, even when insulin remains.
That interval isn't a universal rule for every insulin pen, insulin cartridge or vial. Recording the opening date helps prevent accidental use beyond the product's permitted period.
Comparing the full cost of refills
In the USA, Australia and UK, out-of-pocket costs depend on coverage and eligibility. Therefore, a cash price alone doesn't establish the patient's final bill.
Comparing local and international pharmacy quotes requires matching the insulin, concentration, device, pack size and total units. Supplies, shipping and temperature protection also affect the total cost of home delivery.
International access involves destination-specific prescription and import requirements. The FDA's insulin storage and switching guidance explains why temperature exposure and product substitutions need care.
We dispense prescription medicine only against a valid prescription from a licensed physician. Cost pressure shouldn't lead to skipped doses, needle reuse or unsupervised insulin substitution.
Key takeaways
- Change the injection point with every dose and follow a consistent regional pattern.
- Keep abdominal injections at least 2 inches from the belly button.
- Avoid fatty lumps and arrange assessment for persistent skin changes.
- Use a fresh needle and the device's specified priming and holding steps.
- Moving away from lipohypertrophy may require closer glucose monitoring and a dose review.
This information is for educational purposes only. Consult a licensed healthcare provider for an individual injection plan or changes to insulin dosing.
Frequently asked questions
Where is the best place to inject insulin?
The abdomen is commonly used because it is accessible and insulin works relatively quickly there, particularly regular human insulin. However, the best region also depends on the insulin formulation, available fatty tissue and treatment plan. Healthy tissue and consistent rotation matter more than choosing one universal spot.
How often should insulin injection sites rotate?
The exact puncture point should change with every injection. Rotation can occur within one body region rather than requiring a different region each time. A planned sequence helps spread injections across healthy tissue while avoiding recent punctures, bruises and existing fatty lumps.
How long does injected insulin last?
Quick-acting insulin often lasts 3 to 5 hours, regular insulin about 5 to 8 hours, and NPH about 12 to 18 hours. Long-acting insulin varies, and some formulations work beyond 24 hours. These are approximate profiles; the formulation, dose and individual response affect duration.
What are the five subcutaneous injection sites?
There isn't one universally agreed list of five insulin injection sites. Common guidance identifies the abdomen, thighs, upper buttocks and upper arms. Some diagrams divide these regions differently. For insulin, the important distinction is adequate subcutaneous fat rather than achieving a particular number of named locations.
Should the skin be pinched before an injection?
Most adults using a 4-mm pen needle can inject at 90 degrees without pinching. Greater device length, very lean bodies and some children may require a skinfold or another adjustment. The purpose is to keep insulin in fatty tissue and reduce the risk of entering muscle.
Consistent rotation supports more predictable treatment
Healthy injection tissue helps insulin work more predictably. A repeatable rotation pattern, fresh needles and regular skin checks reduce avoidable problems without changing the prescribed treatment itself.
Existing lumps deserve attention because they can make insulin's effects less predictable. Moving into healthy tissue should include glucose monitoring and clinical review, rather than assuming the previous dose will behave identically.